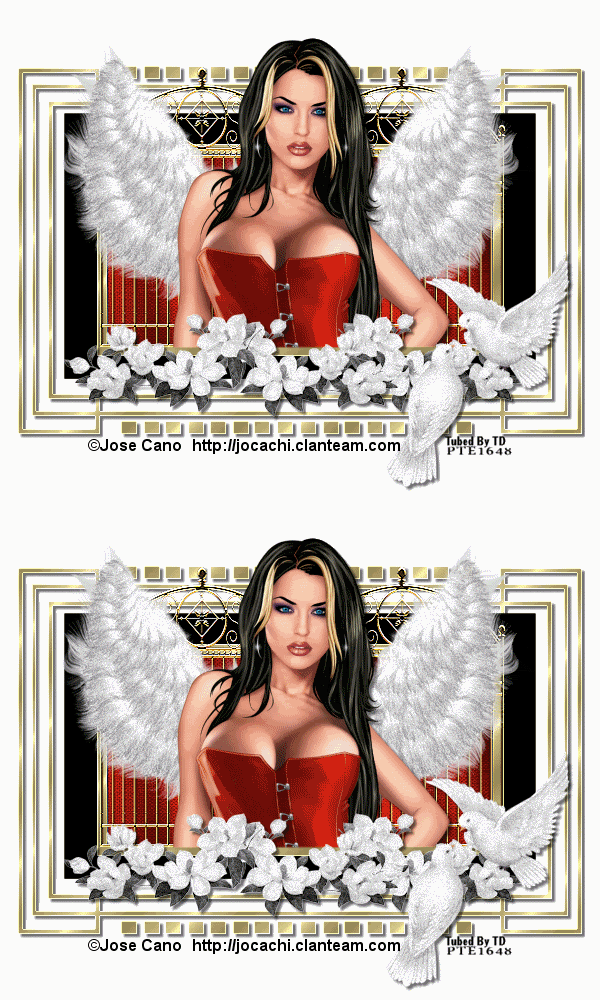
I am using the beautiful artwork of Jose Cano. You can find his artworkHere
The Scrap Kit i am using is called " Heaven "Get It Here
1. Open up template in PSP and deleted my watermark
2. Flood fill the lines around the box with the gold gradient, Effects - Edge Effects - Enhance
and give it a drop shadow using these settings...V-3 H-3 Opacity-50 Blur-3
3. Flood Fill the outter gray box borders with the Gold Gradient
4. Go to Effects - Edge Effects - Enhance
5. Using your magic wand click inside the larger box and flood fill with black.
6. Deselect
7. Using your magic wand again click inside the smaller gray box and flood fill with #800000
8. Effects - Plugin -Graphic Plus - Cross Shadow using default setting. Effects- Filters unlimited
Paper Textures - Canvas, Fine and use default setting.
9. Deselect
10. Merge your two dotted images together and flood fill with the gold gradient. Effects - Edge Effects - Enhance
11. Copy and paste your Jose Cano tube and resize to 70%
12. Using your lasso tool draw around the tube and remove any excess parts..See the design above
13 Give your tube a drop shadow using these settings...V-3 H-3 Opacity-50 Blur-3
14. Copy - paste rs_heavensgates and resize 40%, Effects - Edge Effects - Enhance
15. Copy - paste GodsGift Flower and resize 30%.
16. Duplicate making 2 layers of the flowers
17. Copy - paste love doves and resize 50%
18. Merge all your layers together BUT. your female tube, your flowers and your doves.
19. Merge your doves down to your flowers and duplicate this layer
20. Activate the top layer , Effects - plugins- dsb flux - bright noise 15 - Mix
21. Activate the second flower and bird layer and repeat the noise
22. Give each layer a drop shadow using step 14.
23. Activate your woman tube and using your lasso tool draw around each wing like shown belowl
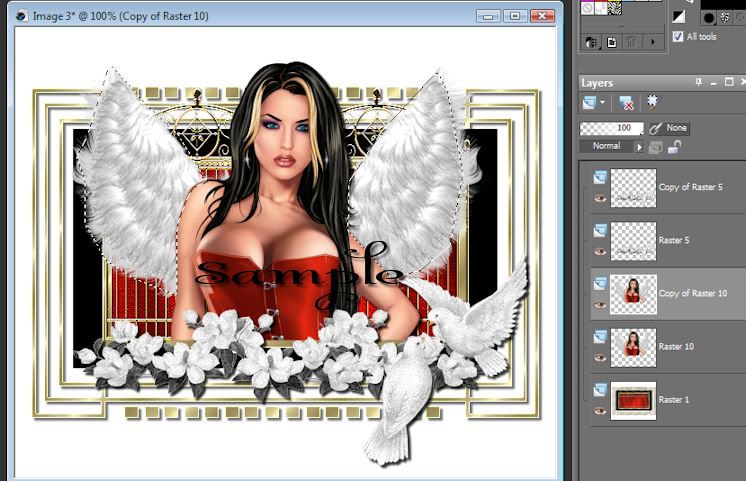
24. Repeat step 21 for each layer.
25. Move one woman layer under one dove-flower layer then merge down and repeat for the other layer like shown below
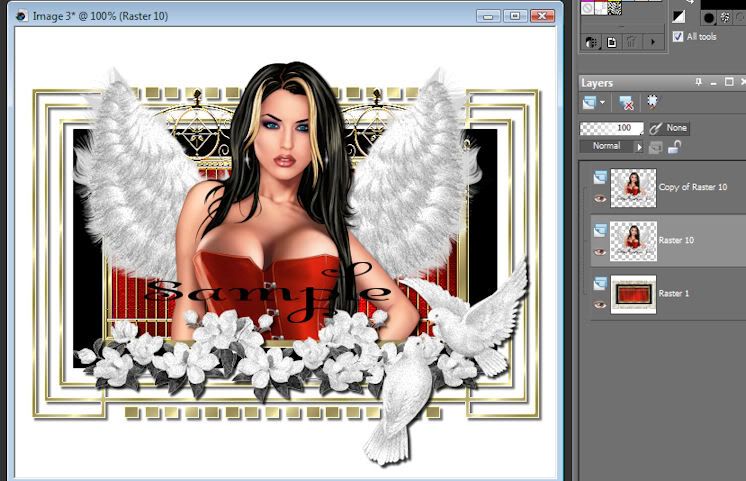
26. Now activate the bottom layer, duplicate and move one under your other layer, like shown below
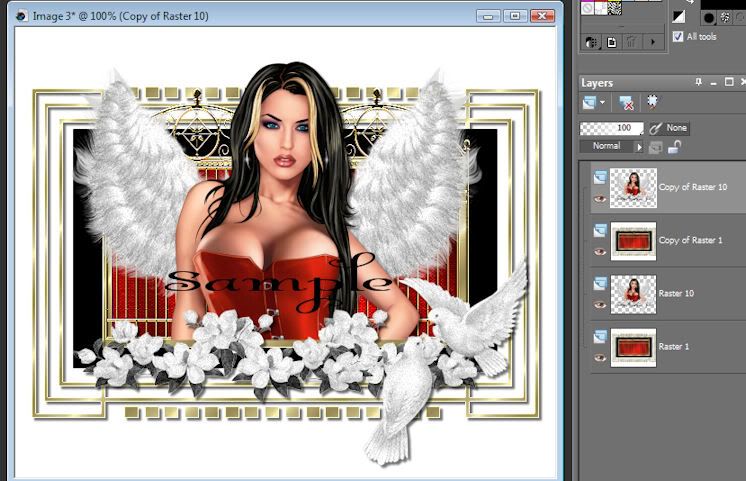
27. Merge each layer down so you have 2 layers like shown below
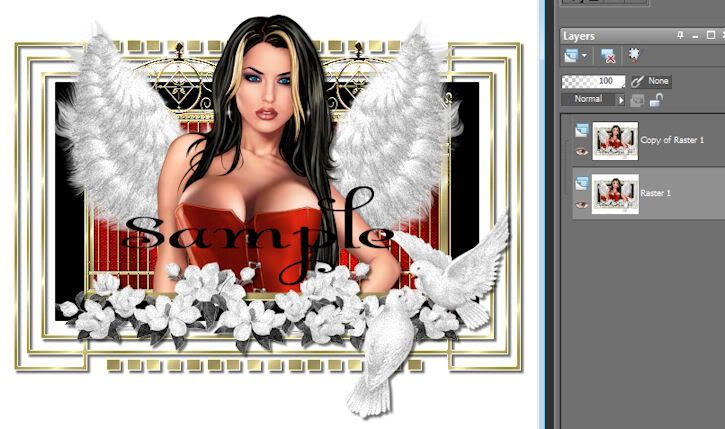
28. Be sure to put the artist watermark and your license # on your design.
29. Activate top layer...Edit - copy
30. Take to animation
31. Edit - paste - as new animation
32. Back to psp
33. Activate your next layer
34. Edit - copy
35. Take to animation
36. Edit - paste after current frame
View your Design and save as gif.
No comments:
Post a Comment