Plugin Used: VM Natural, DSB Flux and they both can be found on the right side of this page under " Plugins Used "
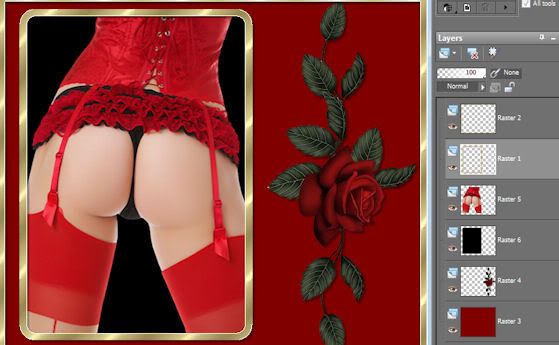
Paste frame into your psp
Copy - paste the rose and move towards the right
Image - free rotation - Direction- Right, Degrees - 90 and make sure the
" Rotate single layer around canvas center" is checked
Give your rose a drop shadow using these setting
V-3, H-3, Opacity-35, Blur-3,
Copy - paste the booty tube and move it below between the gold square and the black box
Your layers should look like below

Copy - paste your double diamond hearts and move to the upper left......or you can move them where
ever you wish
I used the single diamond heart to place over the roses. but have fun and move them where you wish.
Merge all your layers down EXCEPT your diamond hearts layers. You will need to merge all of those down
upon their own seperate layer
So you should have 2 layers now.....your diamonds and your tube,frame,rose etc.

Duplicate your diamond layer twice so that you have 3 layers
Acitvate your first layer
Effects - plugins- dsb flux - Bright Noise Filter Options and set it on " Mix" Intesity " 60 "
Next activate your middle diamond layer and repeat this step
Finally activate your 3rd diamond layer and repeat
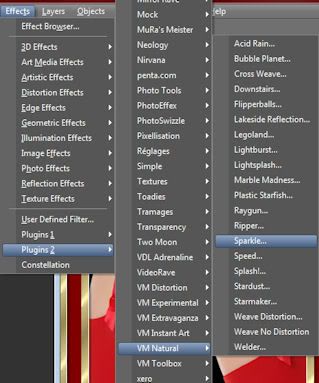
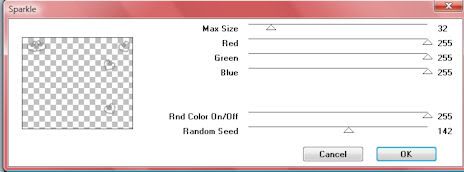
Effects - plugin - VM Natural - Sparles, and use these settings

Activate your middle layer and using the same settings as above, except you will want to change
the random speed to 156
Activate your 3rd diamond layer and use the same settings but change the random speed to 166
Duplicate your frame layer twice so that you have 3 layers
Move one layer under each diamond layer and merge those two down
You should now have 3 layers of your frame and diamonds
Be sure you put your watermark on it if you haven't already. and make sure it has 3 layers to merge down
onto each layer.
Activate your bottom layer
Copy
Take To Animation
Paste as New Animation
Back To PSP
Activate your middle layer
Copy
Take to animation
Paste - as after current frame
Back To PSP
Activate your top layer
Copy
Take to animation
Paste - as after current frame
View your design
And save as gif
No comments:
Post a Comment